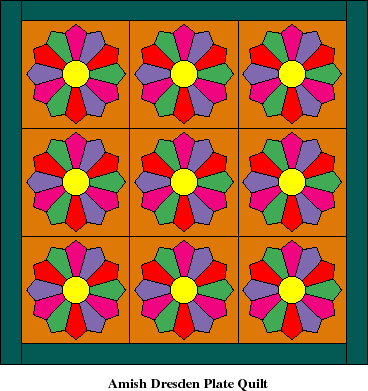

Of all the patterns popular in the 1930’s and 1940’s, the Dresden Plate seems to be very near the top of the list. It is a perfect block for using up scraps, as each of the “blades” can be cut from just a small piece of fabric. Some plates are more sophisticated in that they combine a curved blade with pointed ones. The traditional method for piecing this block calls for turning under the raw outside edges of each blade, making for a lot of hand work and use of a hot iron.We would like to share with you a simple and fun way to sew these blocks - all by machine!
Our magazine pattern is for a 12" (finished) block. Because we design on a Macintosh computer, our templates will print smaller for those of you who are using a PC. But you can convert any Dresden Plate template in your pattern files to the quick-piecing method. As you can see, our template closely resembles a large Tumbler unit. This makes for quick cutting blades from strips.
Diagram 1 shows a standard Dresden Plate template (seam allowance included). Lay this on template material, extend the side lines upward beyond the tip at least 1/4”. To create the top seam allowance necessary for our quick method, draw a horizontal line joining the two side lines, making sure you have 1/4” beyond the tip of the FINISHED blade. Cut out and use for your favorite size block or use our instructions below to make a standard twelve-blade 12” Dresden Plate Block.
Fabric Requirements for 9 Blocks:
1 yard solid for background
1/4 yard (9” x 44”) each of four colors
3-1/2” strip yellow for center circles
1. Transfer pattern pieces to template material
and cut out. Seam allowance is included for blade Template A.
2. From each of the four colors cut two strips 4-1/2" x 44".
Using Dresden Plate Blade Template A cut twenty-seven blades from
each color. Flip-flop the template as shown in Diagram
2, top to bottom.
3. Fold your first blade in half lengthwise, right sides together
and sew across the wide end using a 1/4" seam. See
Diagram 3. Backstitch at the folded edge for the needed reinforcement.
4. Clip the corner as shown in Diagram
4. This eliminates extra bulk in the seam allowance.
5. Finger press the folded edge. Turn the sewn blade right side
out and line up the seam with the crease. Press with a hot iron.
(Diagram 5 shows the blade from the
wrong side.) Repeat for the rest of your blades.
6. These blades can be chain sewn, one right after another, without
clipping threads between. This is a fast way to piece all these
units requiring the same seam.
7. Join the blades together, alternating colors. Use four colors
per Dresden Plate block, with three blades of each color in each
Plate. (See Partial Piecing Diagram)
Sew twelve blades together into a large color, ending by sewing
blade #1 to blade #12, forming a large circle of blades. Press
all the seams either in one direction or press them open. Either
way your plates reveal no raw edges! See Diagram
6.
8. For the yellow center circles, trace the Circle Template onto
the wrong side of the yellow fabric. Add seam allowance for cutting
out. You can use your favorite appliqué method to attach
the circle - hand applique, fusible interfacing, or self-face
the circle, thereby turning the raw edges under by using another
piece of yellow fabric or plain interfacing.
9. From your background fabric cut out nine 12-1/2" squares.
Fold the squares along the centers in both directions and finger
press. Align the Dresden Plates with the creased lines on the
background squares as shown, being careful to check all points
north, south, east and west. Pin Plate in place. Using nylon thread,
machine applique the Dresden Plates to the background fabric.
Add the yellow center circles and applique in place. You may want
to trim the background fabric from behind each plate or you can
leave it in place for an extra layer.
10. To make nine blocks in this manner for a small quilt, join
your blocks together into three rows of three. Add outside borders
of your desired width.
11. Layer quilt top, batting, and backing. Quilt as desired. Add
binding for finishing and enjoy your new, quick method for piecing
a Dresden Plate block!
BONUS: HOW TO MAKE A FANCY DRESDEN PLATE
As you can see in Diagram 7, you can take your Dresden Plates one step further by dividing the blade in half vertically. When two contrasting fabrics are used in each blade, the resulting block is quite stunning! This can be achieved in the following manner:
1. Find the center point of the top and bottom
of the Dresden Plate template. Draw a vertical line on your template.
This will be your guide line for cutting out the blades.
2. Sew together two strips of contrasting fabric and subcut into
wedges as shown in Diagram 7. These
wedges should be at least 1/2" longer than the vertical length
of your template. This will aid you in placing your template accurately.
3. Center the vertical line drawn on your template with the seam
of the two fabrics. Cut out your blade. Please note: Be consistent
in your cutting, whereby one fabric always sits on the left and
the other sits on the right, or else your blades will have irregular
shading.
4. Continue piecing your Dresden Plate blocks as described above.
Back to Quilting Lessons Page