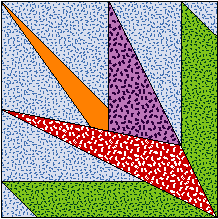
Let's begin with one of my 6" patterns,
The Stylized Flower. All graphics
are on this page. The
Stylized Flower pattern is here. For a pdf
pattern of the flower, click here.
Step 1. Cut a piece of freezer paper 7"
square. Lay the freezer paper plastic side down on top of the
flower design. Using small bits of masking tape on the four edges
will help keep the freezer paper from slipping as you trace/transfer
the line markings from the pattern to the paper using a sharp
#2 pencil. Be sure to include the outside markings of the pattern.
Transfer the numbers also, which will assist in the piecing sequence.
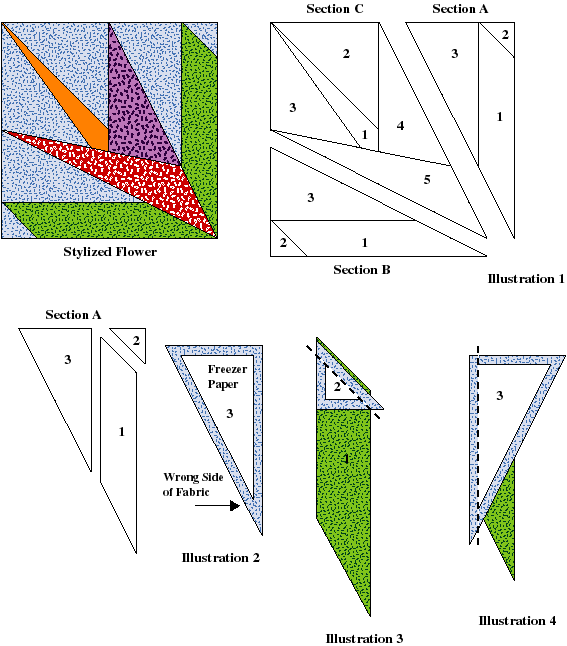
Step 2. Cut apart the freezer paper pattern
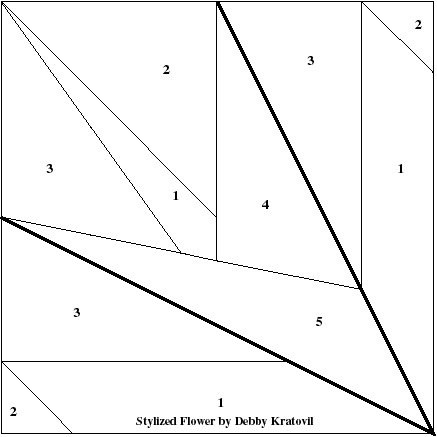
along the lines (Illustration 1). Notice that there are three
major sections to the block.
Step 3. After having made your fabric choices
for the Flower, transfer the freezer paper templates to the WRONG
side of each fabric choice. Use a hot iron to press the freezer
paper onto the fabric. For example, Pieces #1 in Sections A and
B are green. Pieces #2 and 3 in these are light blue. Illustration
2 shows Piece # in Section A with the freezer paper template
pressed to the wrong side of the blue fabric.
Step 4. Cut out each freezer paper template
as shown, adding 1/4" seam allowance all the way around.
It is best to work with each of the three sections one at a time.
Step 5. Stitch the fabric/freezer paper templates
together using the edge of the freezer paper as your sewing guide.
Illustration 3 shows the green Piece #1 being stitched to the
blue Piece #2 (for Section A). The edge of freezer paper on Piece
#2 provides a sewing guide to ensure accuracy.
Step 6. Illustration 4 shows Piece #3 stitched
to Piece #1/2. Again, the edge of the freezer paper is used as
the stitching guide.
Step 7. Continue stitching in this manner,
one section at a time. When all three sections are finished,
join them to each other, again using the edge of the freezer
paper as your stitching guide. Press the block. Remove the freezer
paper templates. These templates can be used again as the plastic
coating will last for several ironings.
While most people would use paper piecing
techniques for this simple Stylized Flower, the method described
above is a great way for a beginning quilter to get accurate
seams. This method is especially useful for intricate blocks
that require many odd shaped pieces and angles. Try your hand
at designing your own block. Size should be no limit as freezer
paper sections can be taped together to make a large drawing
foundation. Simply draw your design, mark natural sections, indicate
stitching sequence and cut apart along your lines. Add 1/4"
seam allowances around each template before cutting out your
fabric and you're on your way!
The Stylized Flower is one of over two dozen
flower patterns on my CD - Quilt Magazine Special Edition of
Foundation Factory. Over 500 patterns for paper piecing from
Quilt Pro. Click
here to find out how you can get your
copy.
Back to Quilting
Lessons Page