 |
by Debby Kratovil |
 |
 |
by Debby Kratovil |
 |
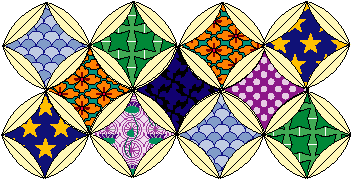
In the truest sense of the word, the Cathedral Window quilt is not really a quilt. It is not created with a backing and batting and has no quilting (hand or machine) stitches in it. But it is still a perennial favorite with quilters the world over, especially those who love hand work and don't mind spending a lot of time making it! The most common color choices are natural muslin for the background color and scraps of tiny calicos for the window panes. The use of another solid background color and coordinating prints or other solids would be just as lovely. It is a perfect fold and sew technique for on-the-go quilting.
 |
Fabric Requirements:
|
1. Pre-wash muslin or other background fabric. Using your rotary cutter and rule, cut the background fabric into 9-1/2" squares. You will need four background squares to complete a 9" Cathedral Window unit. See chart above for the correct number of 9-1/2" squares to cut from background fabric for your quilt size.
2. Cut out six 2-1/2" squares of print fabric for each Cathedral Window unit.
3. Press under 1/4" on all four sides of each 9-1/2" square. (Diagram 1)
4. Fold opposite corners into the middle of the square. Press with hot iron. Repeat for the other set of corners (See Diagram 2).
5. Fold each corner into the center again and pin down. Press. Tack opposite ends together (See Diagram 3). Do this for each of your 9-1/2" squares.
6. Sew the the muslin squares together into larger units by placing them edge to edge. Begin by placing two blocks wrong sides together. Whipstitch the blocks along one side, beginning and ending at the edges of the squares. Repeat for two more blocks. Join the two two-block units together into a four-block unit (see Diagram 4). Each Four-Block section measures 9".
7. If you work the quilt in four block unit sections it keeps the work small and easy to handle as a lap quilting project. Set aside each four-block section as it is made.
8. Pin a 2-1/2" square of your cotton print fabric over the joinings of the four-block units (over the whip-stitched seam line). (see Diagram 5) Roll the folded edges of the muslin "frame" over the raw edges of the cotton print fabric. This will make a small curved frame that is about one quarter inch at the widest part and tapers down to nothing at the corners.Click here to see Block Assembly
9. Blind stitch the rolls in place and tack them together at the corners. Repeat the steps as you continue to make sets of four-block sections.
10. Sew these four-block section rows together to complete a quilt in a size of your choosing.Back to Quilting Lessons Page