 |
 |
 |
 |
Dogtooth Border & Simple Curved Border Spacer Strips & Magical Mitering Setting Diagonal Blocks Quick Triangle Tricks Who says all 4 borders have to be the same?
Students gain the most in a 6 hour class because of the volume of information that I have! There is more experimentation and students get more sewing time in to test their ideas. I bring a LOT of samples which gets the creative juices flowing. This is also successful if all you can allow is three hours.
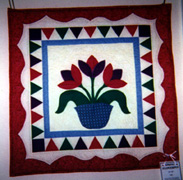
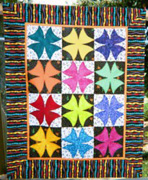
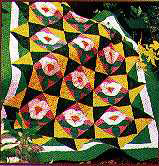
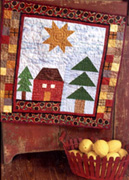
Borders can be more than an afterthought of just one wide piece of fabric. Consider all the possibilities of finishing a whole quilt or just one block. Debby uses many examples to inspire you to include pieced borders to complement the center: paperpieced, 3D folded squares, and a lot of triangle tricks. Simple formulas for both straightset and onpoint arrangements, as well as tricks for making a border fit, are covered. Class photos above are but a few of the quilt treatments we'll cover.
Fabrics: One or two orphan blocks (appliqué or pieced) to consider as the center of a small quilt or pillow (we will work through possible border solutions); two or three 12-1/2" muslin or light-colored fabric sqs. for blocks in our border selections; two or three 1/4 yd. cuts of complementary fabrics to build some borders for orphan blocks or plain squares; various scraps, fabric stripsand 2-3 long-quarter cuts of fabric that would complement your orphan block (select those with good contrast, ie, lights and darks).
A more detailed Supply List will be sent when you book this class.
Skill Level: all (must be comfortable with your sewing machine) Sewing Machine Class.